 Set Up:
- Glue Gun & Glue Sticks
- Scissors
- Felt Sheets (3 Shades of Blue, 1 Green)
- Yellow Construction Paper
- Small Glass Beads
- Sticks
- Flower Tape
- Time: Your roommate taking the dog out and coming back
Step One: Cut your flower Shapes!
Cut three squares, one in each color. Fold the squares into triangles and cut a slit in the triangle from the base to just about 1/2 a cm. before the tip. Then cut each section of the square into a petal shape. Repeat this step for the other 2, Tip: You can use the first one you do as a guideline/pattern for the other two! You'll need to add a criss cross slit to this flower as well. You've already seen this in the other three several times over if you've read through but just in case. Fold the flower in half and cut a small slit in the center, then fold in half the other way and cut another slit in the center to create an X slit for the stick to poke through.
Step Two: Create the center!
Step Three: Add the petals!
Slip the first petal piece onto the stick and upwards towards your center. Slip the next color up and put glue between the two pieces. Repeat this for the third petal piece.
Put a small line of glue to the inner part of two petals on the top layer. Pinch the layer towards the center. Repeat this on the opposite petals on the second layer in between layer 1 and layer 2.
For the third layer make sure to pinch as best you can closest to the center of the layer.
Step Four: Add the greenery!
Cut a square of green about 1"x1", then repeat Step one on a smaller scale for your bottom greenery. Make sure to add a criss cross slit to the center.
For leaves repeat the steps from the other tutorials Or try this! Cut a long rectangle and fold in half. Cut a leaf shape on the half and make sure the folded portion is still connected. Add a small slit in that center so you can slip in the stick.
Glue the bottom piece to the bottom layer of petals. A small drop of glue in the center and then four strips of glue on each side of the bottom piece to the bottom layer of petals.
Slip your leaves on the sticks and put a small strip of glue on either leaf near the center. Pinch the leaves upward.
Step Five: Wrap it up!
Take your floral tape and cut a strip of about 3 inches. Use a small drip of glue on the base of the top greenery, attach one end of the floral tape to that drip. Start wrapping the floral tape tightly around the base and down towards the stick. Tip: Floral tape is waxy, embrace it and use your fingers to pressure the tape onto the stick. You can always wash your hands after!
Repeat this step for the base of the leaf.
Step Six: Flair your center!
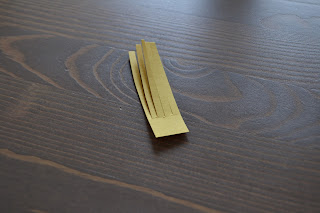
Take scissors and with one blade and your thumb curl from base to tip the yellow pieces in the center. Repeat for each piece. Then put a dollop of glue on the tip of the strips then place 2-3 beads on the ends.
Step Eight: You're Done!
You're finished! Now you have a beautiful Lily! Repeat all these steps and make another one and another one and another one!! Spray them with something that smells good so you can stop and take a whiff!


No comments:
Post a Comment