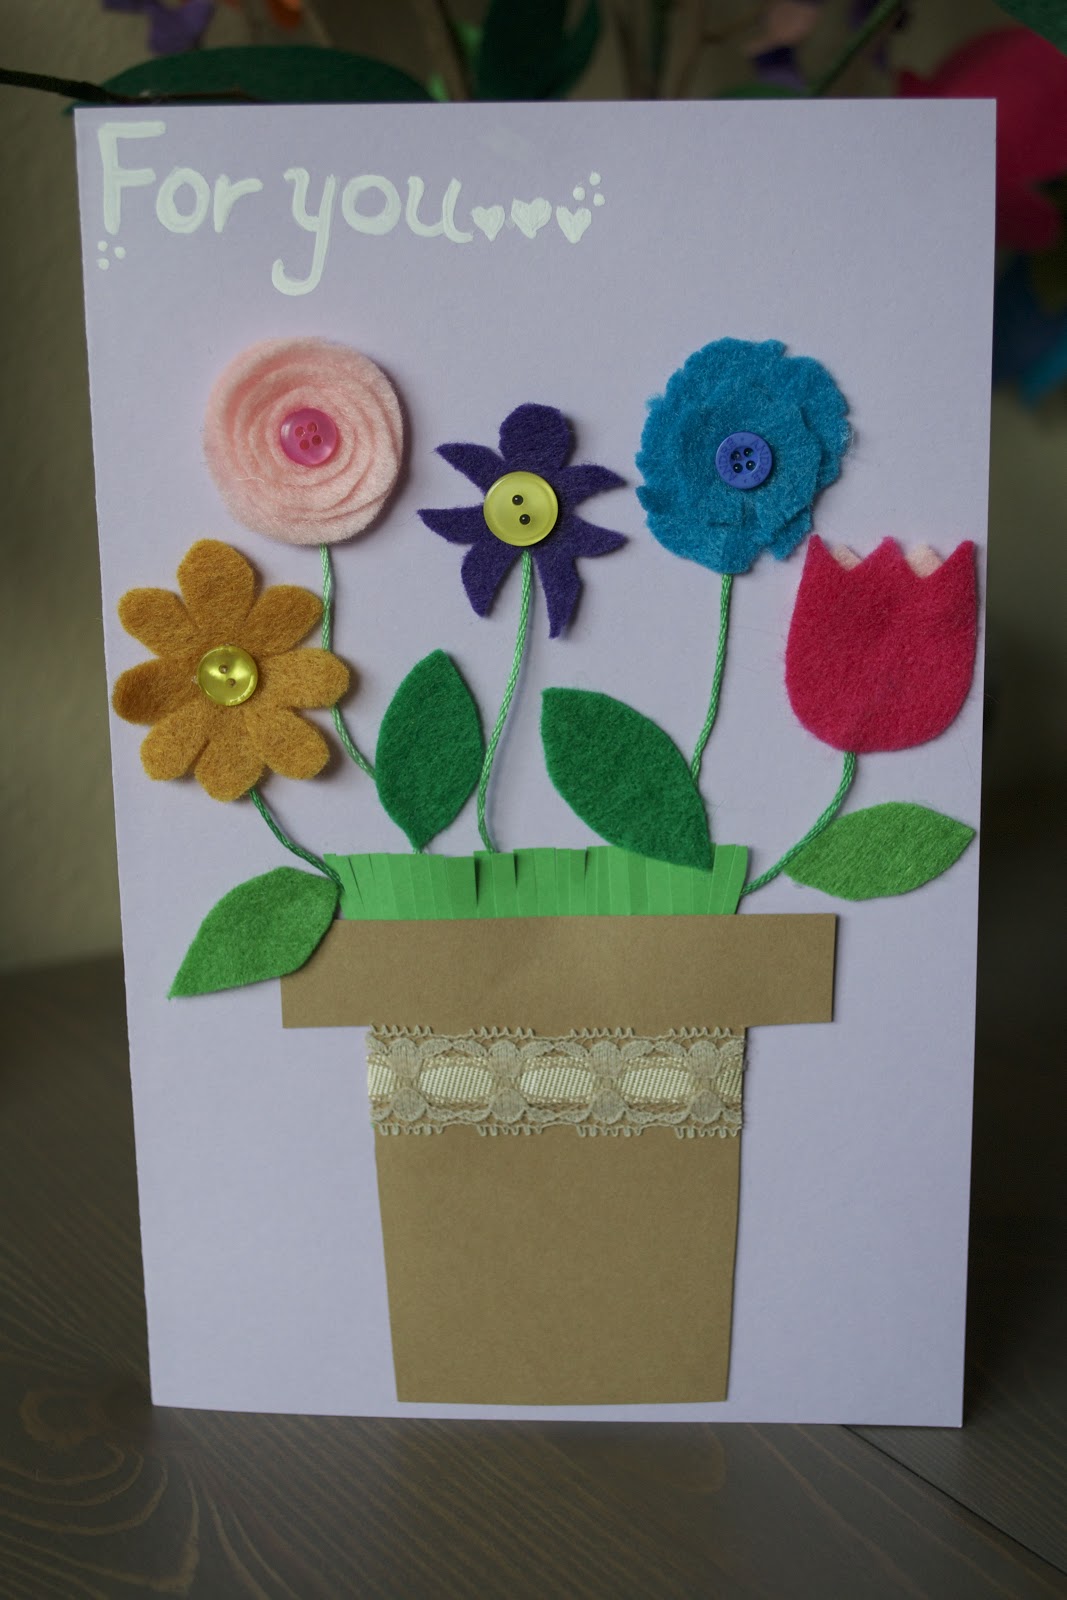
Mother's day is just around the corner on May 12th! Maybe the last tutorial for Mother's Day cards just wasn't intense enough for you! That's fine, kick it up a notch! Make your momma a beautiful flower pot card that will make her feel like a beautiful flower!
Set Up:
- White Craft Paint
- Assorted Buttons
- Light Pink, Pink, Purple, Blue, Goldenrod, and Green Felt
- Light Purple, Green & Brown Cardstock Paper
- Lace Strip
- Green Embroidery Floss
- Glue Gun & Glue Sticks
- Scissors
- Paint Brush
- Time: One Episode of Parks & Rec

Step One: Fold the Card
This one should be self explanatory. Take the paper and meet one end to the other end. Tip: Use the bottom of the paint bottle to pressure the fold straight.
Step Two: Cut Paper Pieces

Take the brown paper and cut into the shape of your pot. Tip: Fold your paper in half and you will create a symmetrical pot.

Take your green paper and cut into a V shape that will fit in your pot. The top of the V should be slightly less wide then the pot top. Take your scissors and fray the edges of the top to create grass.

Glue the grass piece to the back of the pot piece.
Step Three: Create & Add Flower Stems

Take the embroidery floss and cut 5 pieces to about 3 1/2". Take your hot glue gun and glue strips to the back of the grass.


Then put a 3/4 square of glue around the base part of your pot and glue to the card.

Step Four: Create Flowers
For this card I chose to do 5 simple flower embellishments. You can choose to do 5 of the same or mix and match however you like! Now I present MINI-STEPS FOR MINI FLOWERS!

Daisy Flower
Step One: Cut a circle of yellow
Step Two: Fold the circle in half and cut slits to create the petals, then go back and detail the petals with rounded tips.


Step Four: Glue a button to the center of the felt piece! aaaand You're done!
Tulips
Step One: Cut a U shape of the felt with a rounded bottom and a square top.
Step Two: Fold the U in half and cut a triangle out of the flat side.

Step 3: Cut two small triangular pieces and glue them to the back of the Tulip, and you're done! Tip: I used the scraps from the Rose flower to add the triangles to the tulip! Save Felt and save $$! :)


Rose
Step One: Cut a circle of light pink
Step Two: Cut a swirl into the circle. The technique to this is similar to the larger Rose tutorial.

Step Three: Glue small pieces of each layer starting with the interior and working your way out. This is also similar to the Rose tutorial.
Step Four: Glue button to the center of the flower.


Violets
Step One: Cut purple felt into a circle.
Step Two: Cut small triangles to separate the circle into thirds.


Step Three: Cut the center of the top piece into a rounded top. Cut the two bottom sections into Y shaped petals, Cut the remaining piece of the top portion into more petals.


Carnations...Sort Of..
Step One: Cut 2 circles of blue felt, make sure one circle is smaller than the other.
Step Two: Fray the edges of the circles, then clip random tops of the frays.


Step Three: Glue the smaller circle on top of the larger circle & glue button to the center.

Step One: Cut green felt into the rectangles
Step Two: Fold rectangle in half and cut a rounded edge for the leaf.


Step Five: Assemble the Card Pieces
Place a dot of hot glue to the tip of the embroidery floss piece where you would like the flower to be placed. Repeat this step for each flower. Tip: Place the flowers so they will fit before you glue them down! Also, glue from the center outward.


Step Six: Add Lace Embellishment
Measure the lace piece to the pot piece and cut it to size then glue a straight line of hot glue onto the pot piece and place the lace down.

Step Seven: Add Leaves
Place your leaves the same way you placed your flowers to make sure they fit properly, then glue them down with a small line of glue.
Step Eight: Paint your message!
In pencil lightly sketch the letters or embellishments you'd like on the card, then use the craft paint to paint on your message.

You're Done!!


Now write something sweet in there and give that card to your Momma! Give her a hug and maybe a few felt flowers!! Check out With Two N's on Facebook give us a like and share your creations!
No comments:
Post a Comment